Faceless Video Shot List: Turn a Script Into AI Video Prompts
Turn your script into a practical faceless video shot list, with copyable AI prompts, a six-shot example, and clear advice on visuals, pacing, and continuity.
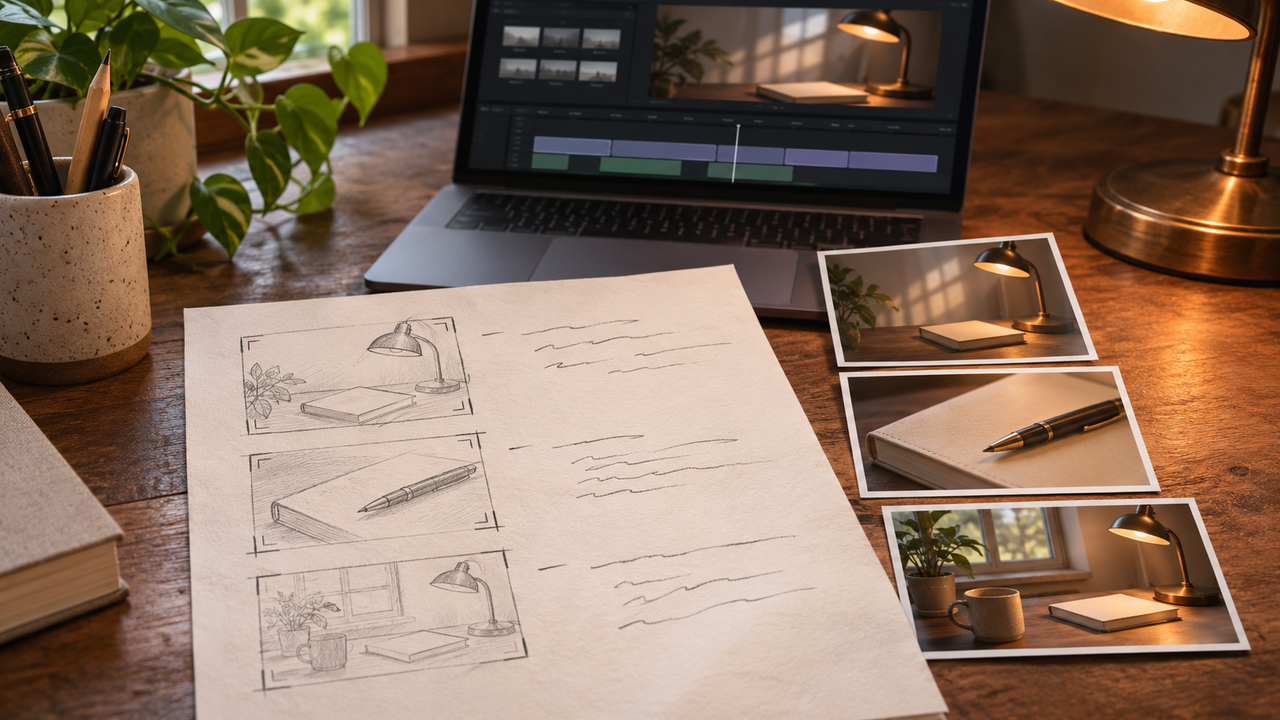
What you’ll take away
- A copyable prompt that turns narration into a usable shot list.
- A six-shot example showing where AI footage, screen recordings, and graphics fit.
- Original AI video prompts and a review checklist for pacing and continuity.
A faceless video shot list turns each part of your narration into a specific visual: what viewers see, how long it stays on screen, and how you will make it. To turn a script into AI video prompts, split the narration into short beats, choose one clear visual for each beat, then describe the subject, action, framing, lighting, and camera movement.
That handoff matters when a script sounds clear but the footage feels random. A sentence about getting focused becomes a city skyline. The next line becomes a robot typing. Both clips might look polished, yet neither explains the point.
This article gives you a script-to-shot-list prompt, a six-shot example, and a way to review the plan before you spend time generating clips. It works for a narrated YouTube Short, a faceless tutorial, or a longer video broken into sections.
1. Give each shot a job
Start with the message the viewer needs to understand. A shot can demonstrate a step, establish a place, show a comparison, or give the narration room to breathe. Write that purpose beside the visual idea.
For a productivity video, a close-up of a notebook can show someone choosing one task. An unrelated mountain landscape would need a clear storytelling reason. Attractive footage alone does not explain an instruction.
Use these fields in your faceless video shot list:
- Narration: the exact words covered by the shot.
- Purpose: what the image helps the viewer understand.
- Visual and source: the scene, plus whether it needs recorded footage, licensed stock, a graphic, or AI generation.
- Framing and movement: for example, overhead close-up with a locked camera.
- Timing: a rough place in the edit, checked against the recorded voiceover.
- Continuity and edit notes: recurring props, reference images, captions, and transitions.
A storyboard adds a visual sketch or reference frame to that plan. You can start with a written shot list and sketch only the shots where composition is hard to explain.
2. Copy this script-to-shot-list prompt
Paste the following into your writing assistant, replacing the bracketed sections. Keep your script separate from the instructions so you can spot any invented narration.
Act as a production planner for a faceless video. Audience: [who will watch]. Format and aspect ratio: [format]. Target length: [length]. Break the script below into visual beats. Preserve the narration exactly. For each beat, return a shot number, narration, visual purpose, suggested footage source, subject and action, framing, camera movement, approximate edit duration, continuity notes, and text to add in the editor. Prefer one main action per shot. Mark claims that need evidence. Flag visuals that would require generated text, precise hand movements, or several actions in one take, and suggest a simpler alternative. Script: [paste script].
Read the response as a rough production plan. Check that every spoken line appears once and that the visuals actually match it. If the assistant has added advice or a statistic, remove it or verify it before recording.
For the rest of the production process, use our faceless content workflow. This article concentrates on the gap between the finished script and the visuals you need to create.
3. A six-shot example for a 30-second faceless video
Here is an illustrative plan for a short video about preparing for a focused work session. The timing is a starting point, not a tested performance claim. Record the narration first, then adjust the cut points to its actual pace.
Shot 1: Establish the problem, 0–5 seconds
Narration: “Before you open your inbox, make one small decision.”
Visual: Record your own browser with a fictional inbox, then pause the cursor before opening a message. Use a close crop that hides account details. A real screen recording gives you control over readable interface text.
Shot 2: Show the decision, 5–10 seconds
Narration: “Pick the task that deserves your best attention today.”
Visual: An overhead shot of a cream notebook on a wooden desk beside an amber lamp. Add “Today’s priority” as an overlay in the editor. Keep the page clear in the generated image.
Shot 3: Make the action concrete, 10–15 seconds
Narration: “Write it on a page so you can see it.”
Visual: Film your own hand writing one task. If filming is impractical, use a still notebook image and reveal typed text over it. Precise handwriting and finger movements create extra things to inspect in an AI clip.
Shot 4: Remove the distraction, 15–20 seconds
Narration: “Close the tabs you don’t need for that task.”
Visual: Record a browser window closing unused tabs. Prepare a clean browser profile with demonstration content so private messages and bookmarks stay out of the recording.
Shot 5: Set the boundary, 20–25 seconds
Narration: “Set a timer for a short work session.”
Visual: Create a simple timer graphic in your editor. Pick a duration that suits the example; the article makes no claim that one interval works for everyone. Add the numbers yourself for legibility.
Shot 6: Land the next step, 25–30 seconds
Narration: “Choose the first step, and begin.”
Visual: Return to the notebook and lamp in a wider shot, with a subtle camera push toward the open page. Leave space for a final caption that names the first step.
Only two of these shots need AI footage. Screen recordings, simple graphics, and footage you film can carry the rest. Choosing the source shot by shot keeps a faceless YouTube video grounded in the thing it teaches.
4. Turn the visual plan into AI video prompts
Build a prompt around the shot you can see in your head. Describe a concrete subject, one main action, the setting, framing, lighting, and camera behavior. These are also core elements in Google DeepMind’s Veo prompting guide.
Here is an original prompt for the notebook shot:
Overhead close-up of a cream notebook lying open on a warm wooden desk, with an amber desk lamp at the upper edge of the frame. The pages are blank. Soft morning window light falls across the paper. The camera stays locked while the lamp casts a steady pool of warm light. Natural editorial realism, restrained movement, consistent desk layout. Keep space on the page for a text overlay to be added later.
Set aspect ratio and clip length in your generator’s controls where available. A prompt can describe the intended shot, but it cannot guarantee exact timing or a perfect result. Trim the usable section in your editor.
For the closing shot, change the framing and movement while keeping the same objects. If your tool supports visual references, supply the approved notebook image rather than relying on a repeated description alone. Google Flow’s documentation explains how reference images and frames can guide a generation. Feature availability varies by model and region.
Our guide to writing AI video prompts goes deeper on motion and camera instructions. If your recurring subject is a person, also plan the references described in consistent AI characters.
5. Review the storyboard before generating every clip
Put rough images or sketches beneath the narration in an editing timeline. This creates a simple storyboard sequence you can watch for meaning and pacing. Temporary frames are enough to reveal where the script outruns the visuals.
Check the sequence with this review prompt:
Review the shot list below against its narration. Identify shots that repeat the same composition, fail to explain the spoken line, contradict an earlier prop or location, or ask for several actions at once. Flag any visual that could imply a factual event we have not verified. Suggest one specific repair for each issue. Keep the original narration unchanged. Do not invent evidence, results, or new claims. Shot list: [paste plan].
Make your own final call after reading the suggestions. A wider shot may help establish the desk; a close-up may make the task readable. You do not need camera movement in every clip. A still frame with a deliberate edit can be the clearest choice.
When a generation misses, name the problem before changing the prompt. “The notebook changes color” calls for a continuity fix. “The camera moves too quickly” calls for a movement fix. Changing five instructions together makes it harder to tell which one helped.
6. Edit for clarity, then check the upload
Build the final sequence around the recorded narration. Add captions and exact on-screen text in the editor, check them on a phone, and remove shots that add no useful information. Listen once without watching; then watch once with the sound off to catch mismatches.
Before publishing, check the rights for each asset and soundtrack, verify factual claims, and review the platform’s current AI disclosure rules. YouTube requires disclosure for realistic generated or meaningfully altered content, including realistic scenes that did not occur. Its guidance treats script assistance differently from realistic generated footage. Decide based on the finished video and the current policy.
Keep the approved references, final prompts, and usable clips together with the shot list. That makes the next video easier to plan without making every upload look identical.
Common questions about faceless video shot lists
Can I turn a whole script into one AI video prompt?
You can ask a tool to interpret a whole script, but a shot-by-shot plan gives you clearer control over coverage and edits. For a narrated tutorial, start with one visual beat per instruction and combine beats only when the action stays easy to follow.
How many shots does a faceless YouTube Short need?
Use the number needed to explain the idea at the narration’s pace. The six-shot example above is a planning exercise for 30 seconds, not a rule for retention. A screen demonstration may need a longer uninterrupted view so viewers can follow the clicks.
Do I need AI footage for every scene?
No. A useful AI video workflow can combine generated b-roll, original screen recordings, licensed media, and graphics. Choose the source that makes each point clear and that you have permission to use.
What should stay the same between generated shots?
Keep the important visual details consistent: the recurring subject, clothing or props, location, lighting direction, and overall style. Write them in the shot list and use approved reference images where supported. Review the actual clips for drift before assembling the final video.
Sources & further reading
About The Faceless Prompts
The Faceless Prompts publishes AI prompt breakdowns and production workflows for faceless content creators. This article includes an original planning example; the sample video was not produced or performance-tested.
Put it into practice
- A Repeatable Faceless Content Workflow: Idea to Published Video
- How to Write AI Video Prompts That Produce Usable Shots
- How to Keep AI Characters Consistent Across Images and Video
- How to Avoid Generic, Mass-Produced AI Videos